
From Sketch to Spec to Ship: Spec-Driven Development with Spec-Kit and GitHub Copilot
A practical walkthrough of Specification-Driven Development using Spec-Kit, GitHub Copilot, and a ghost that just won't stop falling
I’m Siddhesh, a Microsoft Certified Trainer, cloud architect, and AI practitioner focused on helping developers and organizations adopt AI effectively. As a Pluralsight instructor and speaker, I design and deliver hands-on AI enablement programs covering Generative AI, Agentic AI, Azure AI, and modern cloud architectures.
With a strong foundation in Microsoft .NET and Azure, my work today centers on building real-world AI solutions, agentic workflows, and developer productivity using AI-assisted tools. I share practical insights through workshops, conference talks, online courses, blogs, newsletters, and YouTube—bridging the gap between AI concepts and production-ready implementations.
I wanted to build a Flappy Ghost game — a browser-based, zero-dependency HTML5 canvas game — but instead of just vibe-coding it with an AI, I challenged myself to do it properly using Specification-Driven Development (SDD) with Spec-Kit and GitHub Copilot inside VS Code. This post walks through exactly what I did, why SDD matters, and how the whole thing came together.
The Problem with "Just Prompt It"
When most developers use AI coding assistants, the workflow looks like this:
Describe what you want → get code → tweak it → ship it
It works, kind of. But you end up with code that has no traceable spec, no acceptance criteria, and no plan. You can't answer "does this code actually match what was intended?" because there was never a written intention to begin with. That's vibe-coding — and it gets messy fast.
What Is Specification-Driven Development (SDD)?
SDD flips the order. You write the specification first, then derive the implementation from it — with AI doing the heavy lifting at every step, but always anchored to a written artifact you've reviewed and approved.
The SDD cycle looks like this:
Visual Mockup / Idea
        │
        ▼
  spec.md      ← BDD acceptance criteria (Given/When/Then)
        │
        ▼
  plan.md      ← Architecture, technical decisions, file structure
        │
        ▼
  tasks.md     ← Checkbox task list, ordered and granular
        │
        ▼
  Code         ← Generated against the tasks, traceable to spec
        │
        ▼
  Validate     ← Does the code satisfy spec.md acceptance criteria?
At each phase, a human reviews and approves the artifact before the next phase begins. Copilot doesn't proceed until you say so. This enforces spec-first discipline and gives you traceability from every line of code back to a user story.
What Is Spec-Kit?
Spec-Kit is an open-source CLI tool from GitHub that scaffolds the SDD workflow directly into your project. It installs a set of Copilot agent files (.github/agents/) that extend GitHub Copilot Chat with slash commands like /speckit.specify, /speckit.plan, /speckit.tasks, and /speckit.implement.
Once initialised, your project has a structured .specify/ folder with templates, scripts, memory (a project constitution), and integration configs. Copilot reads the agent files automatically — no extra configuration needed.
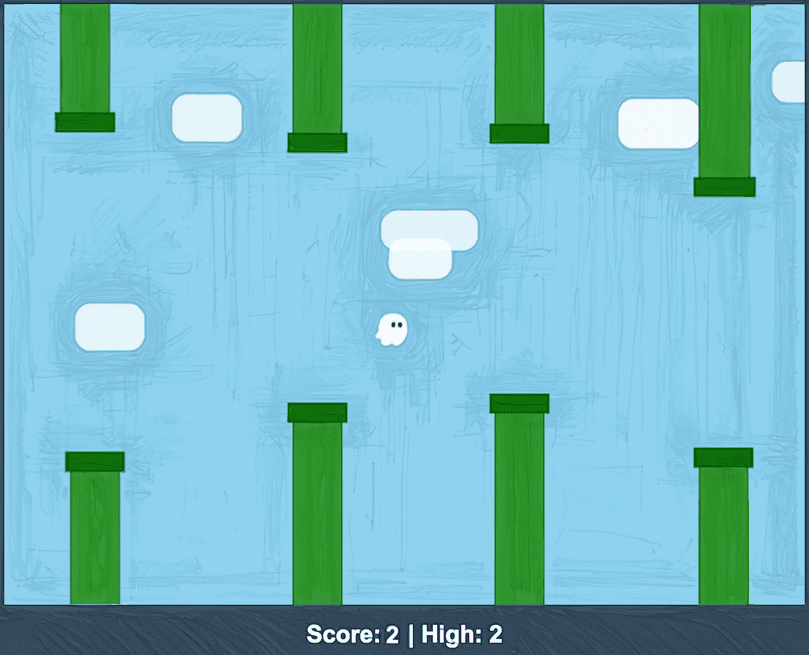
My Scenario: Flappy Ghost 👻
I had a hand-drawn mockup image of a Flappy Bird-style game with a ghost as the player. The design showed:
Light blue sketchy/pencil-textured background
Green pipes extending from top and bottom edges
Rounded cloud platforms as mid-field obstacles
A dark floor strip with a score HUD:
Score: X | High: XA ghost emoji (
👻) as the player character
The goal: a single self-contained index.html — no frameworks, no build tools, no CDN links. Just vanilla HTML5 Canvas and JavaScript.
Step-by-Step: How I Built It
Step 1 — Install the Tooling
Spec-Kit's CLI (specify) is installed from GitHub, not PyPI. Use uv (a fast Python package manager):
# Install uv (Windows)
winget install --id=astral-sh.uv -e

# Install specify CLI (check releases for latest tag)
uv tool install specify-cli --from git+https://github.com/github/spec-kit.git@v0.11.5

# Verify
specify version
⚠️
pip install speckitinstalls a completely unrelated spectral analysis library. Always use theuv tool installcommand above.
Step 2 — Initialise the Project
mkdir flappy-ghost
cd flappy-ghost
git init
specify init flappy-ghost --integration copilot
code .
This scaffolds everything into .github/agents/, .github/prompts/, and .specify/. Open .github/agents/ — you'll see agent files like speckit.specify.agent.md, speckit.plan.agent.md, etc. These extend Copilot Chat with the /speckit.* slash commands.
Step 3 — Generate the Spec from the Mockup Image
This is where SDD gets interesting. I opened GitHub Copilot Chat in Agent mode (Ctrl+Alt+I), selected the speckit.specify agent, attached my mockup image, and described the feature:
Use the attached sketch as the visual specification for a browser-based
HTML5 canvas game called "Flappy Ghost".

The game must match everything visible in the image:
- Hand-drawn / sketchy art style for all visuals
- Small ghost emoji as the player character
- Green pipe obstacles from top and bottom
- Rounded cloud platforms as mid-field obstacles
- Light blue pencil-stroke textured background
- Dark grey floor strip at the bottom
- Score HUD: "Score: X | High: X"
- Spacebar or click to flap; gravity pulls down
- Collision with pipes, clouds, floor, or ceiling ends the game
Copilot generated features/001-flappy-ghost-game/spec.md — a full BDD spec with user stories and acceptance scenarios. For example:
Given the game is running and the player does nothing, When each frame advances, Then the ghost's vertical velocity increases by the gravity constant until it reaches terminal velocity.
Seven user stories covered: flight loop, pipe obstacles, cloud platforms, floor/ceiling boundaries, score tracking, game over/restart, and the hand-drawn art style.
git add .
git commit -m "feat(spec): flappy-ghost-game specification"
Step 4 — Generate the Implementation Plan
Back in Copilot Chat:
/speckit.plan The game is a single self-contained index.html file.
Use vanilla HTML5 Canvas and JavaScript — no frameworks or build tools.
Copilot read spec.md and wrote plan.md covering canvas setup, the requestAnimationFrame game loop, physics model (gravity constant + flap impulse), pipe and cloud spawning, collision detection (AABB), score tracking with localStorage, and the sketchy rendering approach.
git add .
git commit -m "feat(plan): flappy-ghost-game implementation plan"
Step 5 — Break It into Tasks
/speckit.tasks
Copilot produced tasks.md — a numbered checkbox list:
[ ] T1: Create
index.htmlwith canvas element and score HUD[ ] T2: Implement game loop with
requestAnimationFrame[ ] T3: Render ghost as 👻 emoji on canvas (34px, velocity-rotated)
[ ] T4: Implement gravity and flap physics
[ ] T5: Pipe spawning at random heights with fixed gap
[ ] T6: Cloud platform spawning (white rounded rects, mid-screen)
[ ] T7: Collision detection (ghost vs pipes, clouds, floor, ceiling)
[ ] T8: Score increment on pipe pass; high score via
localStorage[ ] T9: Game-over overlay with restart prompt
[ ] T10: Sketchy background — pencil-line pattern pre-rendered to off-screen canvas
git add .
git commit -m "feat(tasks): flappy-ghost-game task breakdown"
Step 6 — Implement
/speckit.implement
Copilot worked through tasks.md top-to-bottom and generated index.html. When the first pass looked too clean, I followed up with a targeted style prompt:
The art style must look hand-drawn:
- strokeRect with ±3px random jitter on pipes and floor
- Ghost as 👻 at 34px, rotated proportionally to vertical velocity
- Background: #a8d5e8 fill, overlaid with diagonal pencil strokes (off-screen canvas)
- Clouds: white rounded rectangles with canvas shadow blur glow
- Floor: #2d2d2d strip, 40px tall
- HUD: monospace, white, centred in the floor strip
Result: a working index.html that opens directly in the browser, no server needed.
Step 7 — Validate Against the Spec
I opened index.html in the browser and manually tested against each acceptance scenario in spec.md:
✅ Press Space → ghost flaps upward, gravity pulls it back down
✅ Fly into a pipe → Game Over triggers
✅ Pass through a gap → score increments
✅ Reload the page → high score persists via
localStorage✅ Background has visible pencil-stroke texture
✅ Ghost rotates with velocity direction
Every test traced back to a specific Given/When/Then in the spec.
The Key Insight: Traceability
Without SDD, you have code. With SDD, you have:
spec.md → what the software must do (acceptance criteria)
plan.md → how it will be built (architecture decisions)
tasks.md → what was built and in what order
code → the implementation, traceable to every task above
If a bug appears, you don't just fix it — you check which acceptance scenario it violates and trace it back. That's the discipline SDD enforces.
Spec-Kit Slash Commands Reference
| Command | Purpose |
|---|---|
/speckit.constitution |
Establish project coding standards |
/speckit.specify |
Create feature spec from description or image |
/speckit.clarify |
Surface ambiguities before planning |
/speckit.plan |
Generate technical implementation plan |
/speckit.analyze |
Cross-check spec, plan, and tasks for consistency |
/speckit.tasks |
Break plan into actionable task checklist |
/speckit.implement |
Execute tasks and generate code |
/speckit.checklist |
Generate quality checklist for the feature |
/speckit.converge |
Assess codebase against spec and append remaining work |
Final Thoughts
SDD with Spec-Kit didn't slow me down — it made every AI-generated output useful because it was grounded in something I had reviewed. The mockup image became a living specification. The spec became the plan. The plan became tasks. The tasks became working code.
If you're using GitHub Copilot and finding that "just prompt it" leaves you with code you can't justify, this workflow is worth trying. The spec is the contract — everything else follows from it.
Try it yourself: github.github.com/spec-kit